
Basque Cheesecake
Spain's glorious creamy Tarta de Queso

I’m on a mission to bake more. I’ve always been drawn to cooking… but baking intimidates me. It has to be precise. What if something is measured incorrectly, or the whipped stiff peaks are TOO stiff? How do you correct mistakes?
However, the only way to get better at something is practice. I’ve been baking a lot more, and this dessert was at the top of my list to try.
This cheesecake is super creamy, dramatic, and deceivingly simple to make. It’s also the perfect dessert to make when you’re hosting. It makes a whole bunch of servings, the ingredients and steps are straight-forward and it comes out looking divine. Dare I say… impressive.
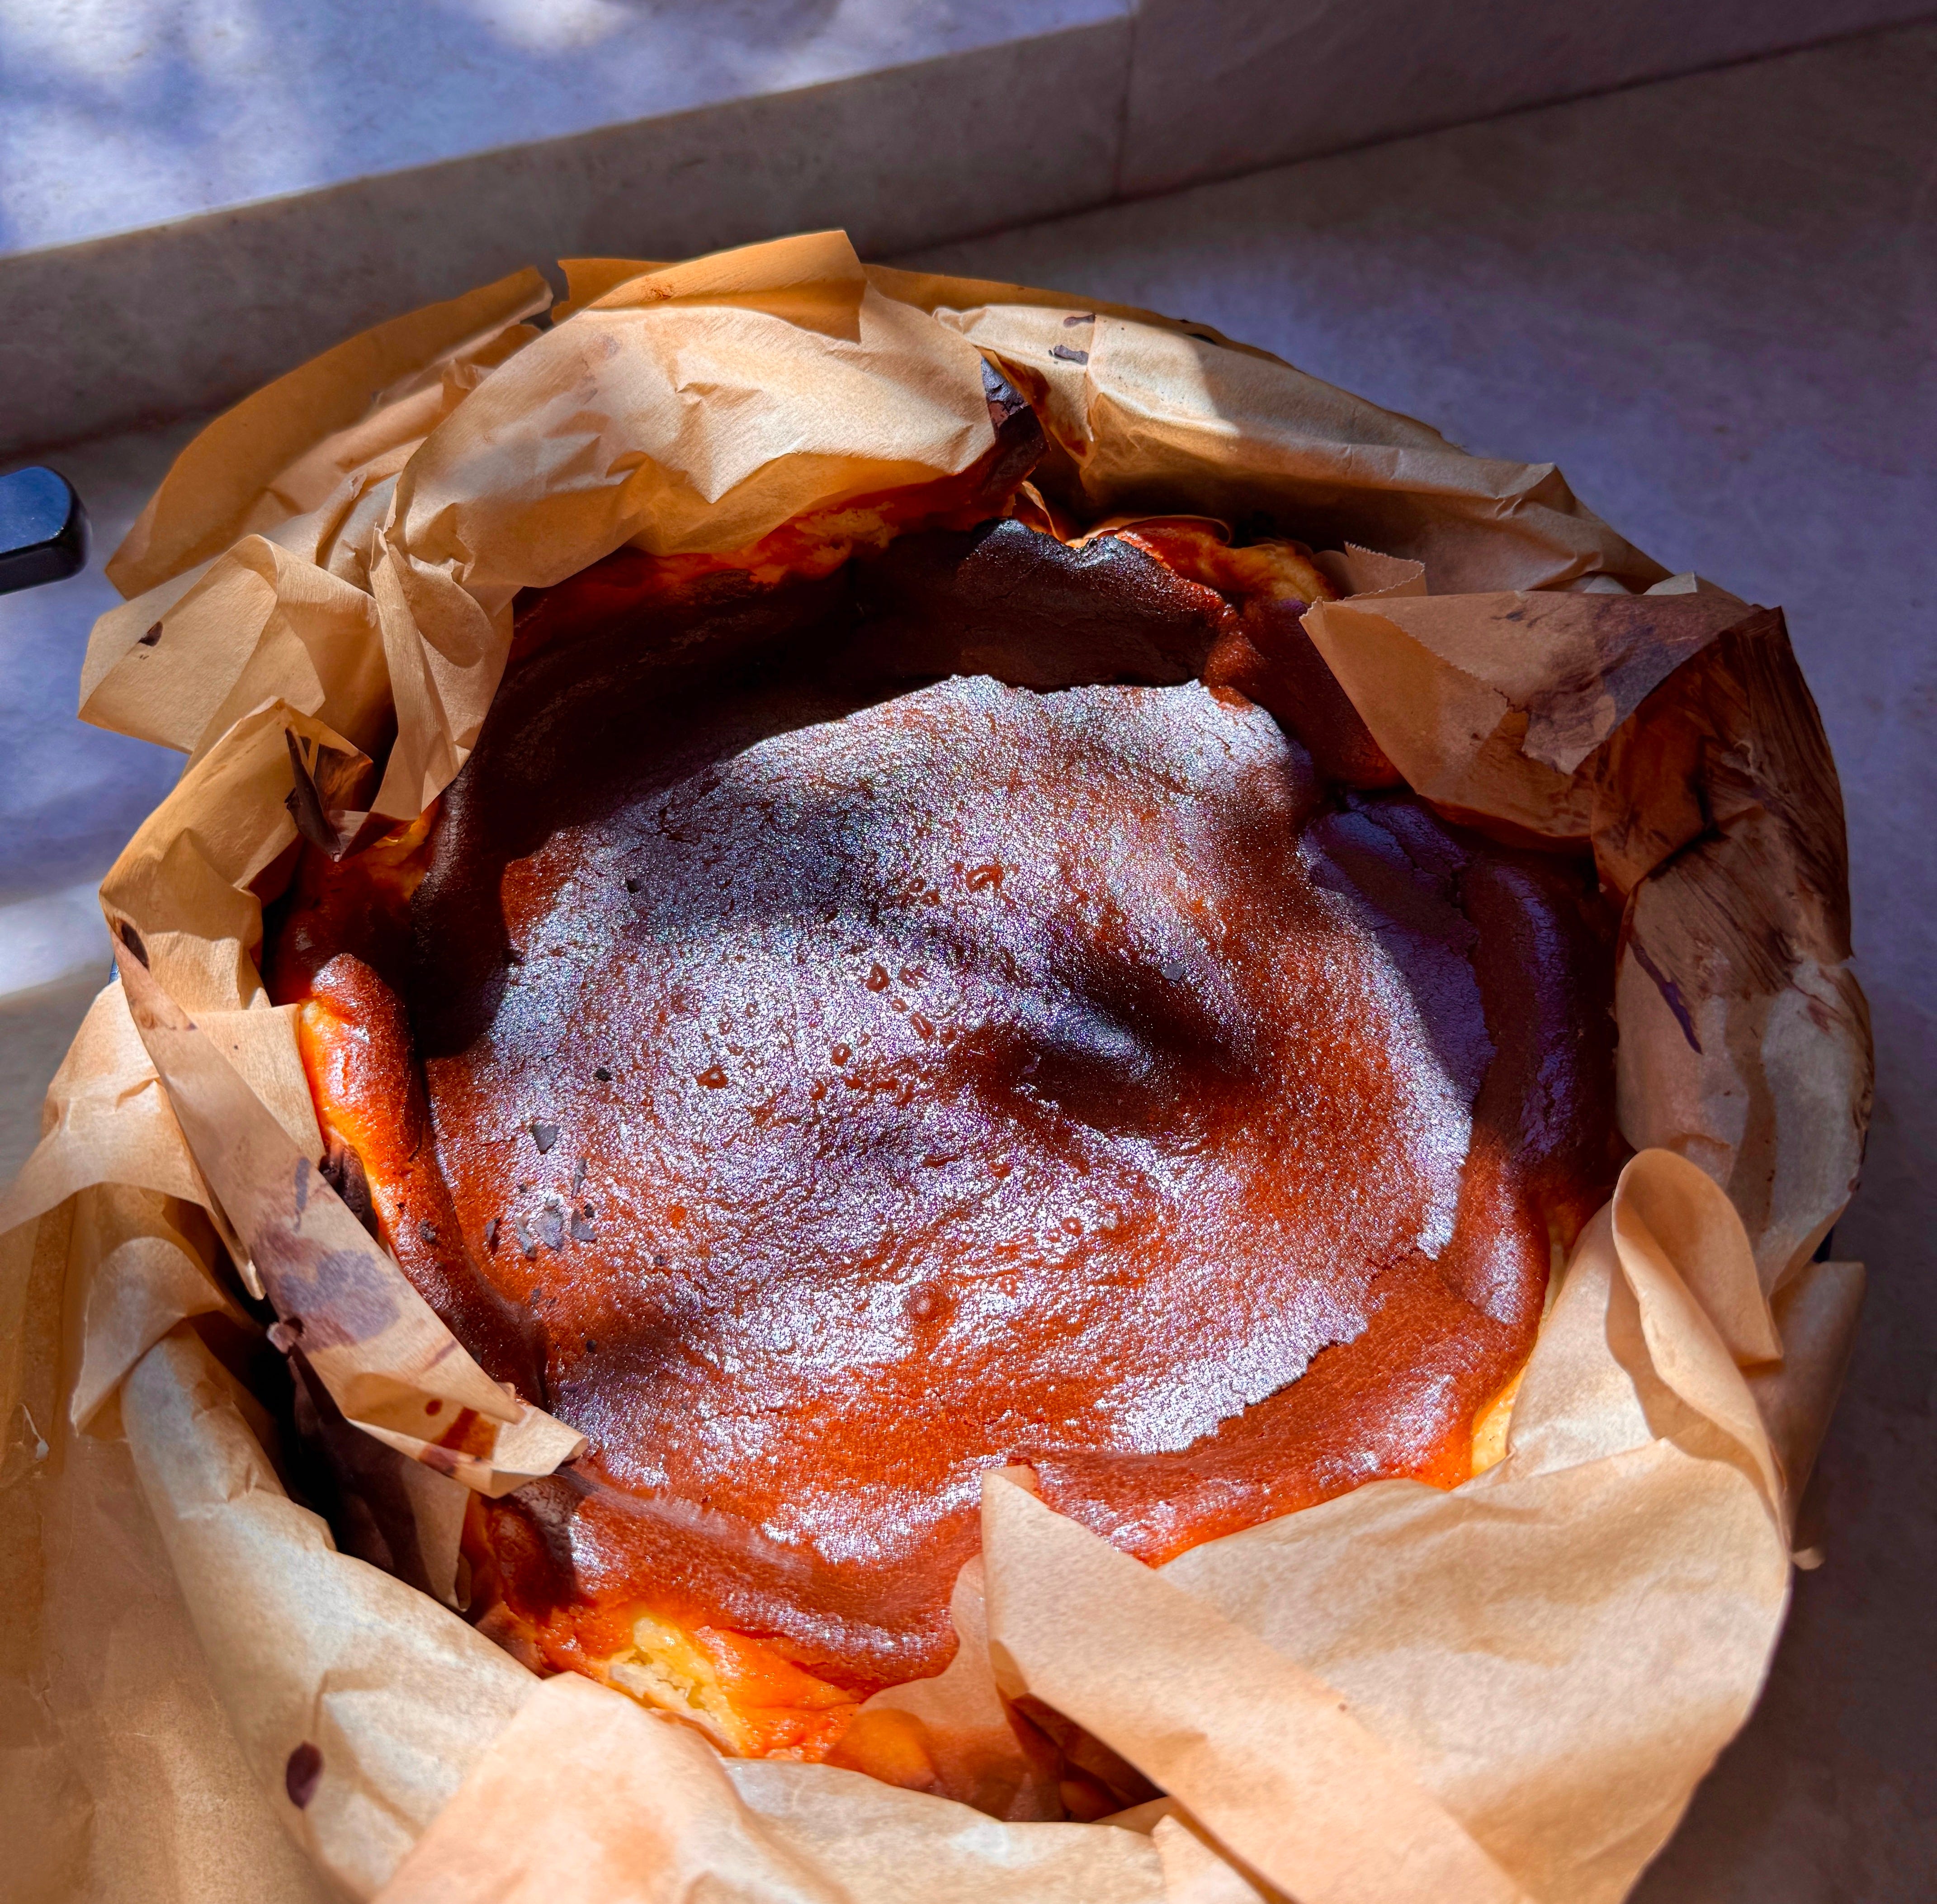
Originating in the Basque region of Spain, it was first created at La Viña, a pintxos bar in San Sebastián, in the 1990s. Unlike a traditional cheesecake, this uses high heat and no crust, resulting in a deeply caramelized “burnt” looking top. That top is where the magic lives.
This dish is on my culinary bucket list, but until I can taste it in Spain for myself… here’s the recipe.
Ingredients
Servings: 8–10
Prep Time: 15 minutes
Cook Time: 50 minutes
Chill Time (Optional but Recommended): 4 hours to overnight
3 (8-ounce) blocks full-fat cream cheese, room temperature (678g)
1 cup granulated sugar (200g)
¾ teaspoon fine sea salt
2 teaspoons pure vanilla extract
4 large eggs, room temperature
2 tablespoons all-purpose flour, sifted
1½ cups heavy cream (360mL)
Butter for greasing the pan
Equipment:
9-inch springform pan
Electric mixer (stand or hand — you can also make this by hand if needed!)
Fine-mesh sieve
Offset spatula or rubber spatula
Parchment paper
Instructions:
1. Prepare the Pan
Preheat your oven to 425°F (220°C) with the rack in the middle.
Grease your 9-inch springform pan with butter on the bottom and along the sides.
Cut two large sheets of parchment paper, and lay them in opposite directions in the pan. The paper should come up and over the edges by 2 to 3 inches.
The paper will naturally crinkle, that’s part of the look. Feel free to crinkle and crease it as much as you please!
2. Beat the Cream Cheese and Sugar
In the bowl of a stand mixer fitted with a paddle attachment (or using a hand mixer), beat the room-temperature cream cheese on medium speed for 2 to 3 minutes, until completely smooth and creamy.
Add the sugar and continue beating for another 2 minutes, scraping down the bowl halfway through. It should look glossy with no lumps.
Note: If you’re whisking by hand, use a sturdy whisk and beat the cream cheese and sugar together vigorously until the mixture is smooth.
3. Add Salt, Vanilla, and Eggs
Add the salt and vanilla extract (or the inside of a vanilla bean pod), mix until combined.
Add the eggs one at a time, beating for about 15 seconds between each. Be sure to scrape down the sides as needed to make sure everything is fully incorporated.
4. Add Heavy Cream and Flour
With the mixer on low (or while whisking gently by hand), gradually pour in the heavy cream, mixing until the batter is smooth and fully incorporated.
Next, sift the flour directly over the batter to avoid clumps. This may seem like a small step, but it makes a noticeable difference in the texture.
Mix on low speed or by hand just until the flour disappears into the batter. Be careful not to over-mix—too much air can lead to a lot of cracks or an uneven rise. The final batter should be silky and thick, but pourable.
5. Fill and Bake
Pour the mixture through a fine-mesh sieve into your prepared parchment-lined pan. Use a spatula to smooth the top gently if needed.
I personally forgot to strain it through a sieve until it was in the oven… but this will ensure the creamiest lump free result.
Tip: Tap the pan on the counter two times to release any large air bubbles.
Bake for 45 to 55 minutes, checking at the 45-minute mark.
The top should be a deep brown, verging on burnt, and the center should still jiggle like Jell-O when shaken.
The cake will rise significantly AND… fear not if you see a few cracks, that is normal.
The first time I attempted this, I left it in the oven closer to 65 minutes because the top didn’t look “burnt” enough and it still felt way too jiggly. Once I took it out and it cooled I realized… it was overcooked - a little toooo burnt.
Remember (note to self), it will firm up as it cools!
6. Cool and Chill
Remove from the oven and let cool in the pan on a wire rack for 2 hours. The cake will sink slightly and settle into a dense, delicious and custardy texture.
Once cool, cover and refrigerate for at least 4 hours, preferably overnight for the best results. The patience is hard but the flavors and textures are so worth it.
Now… while that chills…let’s talk toppings
Traditionally, it is served just on its own. And just on its own its absolutely glorious decadent heaven.
However… if you want to explore topping options– I had a lot of strawberries at home and thought a fresh bright sauce could balance the richness of the cheesecake well.
Rinse and hull your strawberries, then add them to a small pot over medium low heat with sugar, lemon juice, and a pinch of salt.
Cook for 8-10 minutes, stirring occasionally, adding a splash of water if needed.
Keep stirring until the strawberries break down and the sauce thickens slightly.
You can blend and strain the mixture for a smooth sauce, or leave it more as a compote. Both are great!
Cool it completely before serving with the cheesecake.
7. Serve
Whenever the moment arrives, remove the cheesecake from the springform pan, peel back the parchment paper (super dramatically with Vivaldi's "Winter" Concerto No. 4 playing) and let it sit at room temperature for 30–45 minutes before slicing. This ensures you achieve the ideal texture: custard-like toward the center and firmer at the edges.
If you’re adding the topping, drizzle as much as you please over your slice and enjoy!
I’d love to hear what desserts you would like recipes for!
Until next time,
Ana Sofía
Well now I have to go and buy a spring form pan, I always wanted one too.
Mine turned out great!